Showing posts with label #LindaHess. Show all posts

Friday, July 23, 2021


Welcome to a New Year of Art fun!!  After a COVID year of teaching from a cart, I am SUPER excited to be returning to my classroom space!  Let me take you on a tour of my revamped and redecorated classroom.  
What room decoration and welcome would be complete without a welcoming entrance?  I think the kids will be excited to enter!  For those of you who are hanging-challenged with cinder block walls like mine, may I recommend the heavy-duty Command Strips.  I wiped down all the surfaces with Clorox wipes, dried them with paper towels, and then attached the Command Strips.  MAGIC!  So far only one picture has fallen, though these crosses may be tested as students rub along the walls (fingers crossed).


As you can see, inspiration abounds in this space.  I can honestly say that if there is an empty space, I have attached some kind of art to it.  I collect pieces to inspire my students from travels, thrift shops, local artists, former students, and eBay, as well as my own art.  In the front of my room, I showcase the Elements of Art.  


The Artist Oath and the A-R-T volume control posters are clearly visible over the whiteboard.  Teaching in a Catholic School we begin every class with a prayer (framed and hung above the whiteboard).  All 3 of these pieces are important for consistency throughout all of my classes (K-8th).  This year I will be adding PreK back into the mix, but I will be traveling across the campus to see them in their own space.  It won't be as overwhelming size-wise for them.  I look forward to them becoming Kindergarteners next year and coming into my space 💜


Continuing the tour around the room we pass by my desk (decorated of course).  The drying racks are ready for art projects to fill them.  Artwork (new and old pieces) line each divider between the windows (again, thank goodness for Command strips!).  I'm anxious to see how observant my students will be.  


This year we will have desks instead of tables, to accommodate distancing rules.  So far they are stacked in the center of the room but should be laid out soon.  Along this wall, you can see my new printmaking station, filled with brayers and awaiting the carving tools from my wishlist (more about that later).  The bunged-up green cabinets have been repainted to start the year fresh.


My brother's panoramic photo of bison in Yellowstone has moved from above the bulletin board paper rolls to above the door.  I think it is a much better fit!  The clock which disappeared last year is now safely back in place (it was a bit of a distraction last year).


New art has been hung over the bulletin board paper: a handmade and embossed triptych that I found at a thrift shop and will use as inspiration as we make our own handmade paper AND a painting done by a young Russian artist who is disabled (I bought this one specifically to show that anything is possible as long as you try).


That brings me back to my printing station and my wishlist.  I have created an Amazon wishlist in hopes that I can accumulate enough tools to teach my older students relief printing and how to create their own carved blocks.  The yellow bins will house the tools as they are accumulated.  If you would like to help stock my classroom, please follow the link below to my wishlist...and THANK YOU in advance 😁


I'm looking forward to a great 2021-22 school year!


Tuesday, May 19, 2020

Turtle time!

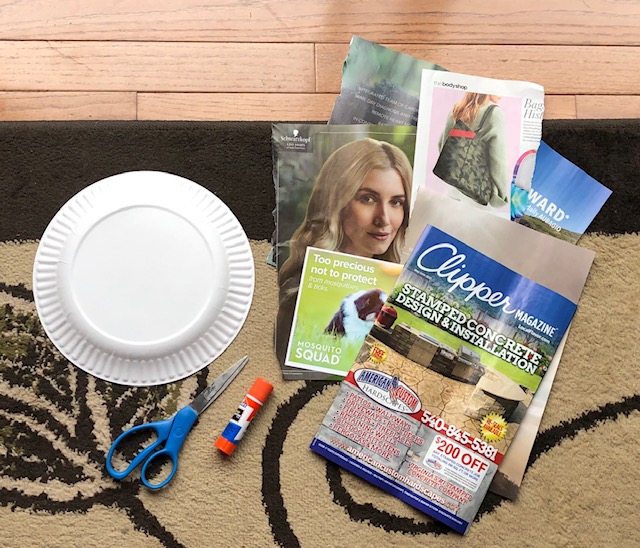
Welcome to another week of homeschooling, courtesy of the Coronavirus!  This week I will be sharing a project for my PreK students.  It combines their study of turtles with the recycling of magazines and junk mail that is flooding our homes.  Enjoy!


Materials:
1 paper plate
magazines, junk mail, newspaper
1 blank sheet of paper 
pencil
scissors
glue stick
crayons or markers

Step 1: Gather your materials.  I went through magazines and pulled out a variety of pages that had turtle colors appropriate for the shell.  Looking at the box turtle diagram above, you can see that turtles come in a variety of colors.  Your turtle can be realistic (that means it looks like the real thing) or it can be straight from your imagination (wouldn't a rainbow turtle shell be cool?!).  I decided to go for a turtle with a variety of greens, beiges, browns on its shell.  


Step 2: Begin cutting out shapes from the pages. You could make ovals like I did OR you could cut circles, triangles, squares.  It is totally up to you!  


NOTE: I cut my shapes out of the colored sections that went along with my turtle shell.  Remember to place the rest of the paper "trash" in your recycling bin.


Step 3: Beginning in the center of your plate, glue one shape down.  Then, start gluing piece around it in a circle pattern (see below).  I put the glue on the plate rather than putting the glue on the shape (I think it is easier to see where the pieces go).  That is a personal choice though.

Continue gluing shapes round and round until the plate is full.  While you are gluing your paper plate will flatten out.  DO NOT STRESS! Once all of the pieces are in place you can "POP" the turtle shell back into shape (see below).


Now it is time to create the rest of your turtle.

Step 4: On your blank sheet of paper, draw a head, tail, and 4 feet.  Do you see what shape the tail is??  RIGHT!  A triangle 😀  For your head, draw a circle and a neck (the neck looks like a rectangle).  Your feet can be any shape you wish.  I made mine round on one side and flat on the other, kind of like an oval with a flat side.


Step 5: Once your shapes are drawn, color them in.  I used green, but (again) use your imagination to color your turtle!  It could be green, brown, grey, black, OR a mixed up rainbow!  Be sure to draw a face on your turtle head.  I decided to give my turtle some toes 😉   Once you have finished coloring, cut out your pieces.


Step 6: Glue everything in place!  Turn the plate upsidedown (so you don't see the top of the shell).  I always start with the head followed by the tail.  Gluing these two pieces first will make it so much easier for placing the feet!


Now glue the feet in place.  

All done!!  Turn your turtle over and admire your beautiful creation ❤ 


I hope you have enjoyed creating your turtle.  If you are one of my students, please be sure to post a photo of your creation in the Google Classroom.  I can hardly wait to see!

And if you are a visitor to our blog, WELCOME!  Hope to see you again.


Tuesday, May 12, 2020

2020 Cardboard Challenge!

What can you make from cardboard?!  I am sure you are accumulating lots of boxes from cereal, crackers, Amazon shipments (haha).  Why not use that cardboard to CREATE a gorgeous sculpture?!

Follow the steps below and then post a photo in your Google Classroom!  ENJOY ❤


Welcome to a New Year of Art fun!!  After a COVID year of teaching from a cart, I am SUPER excited to be returning to my classroom space!  L...